Jinda
Jinda is a gem to create Rails Workflow & Application Generator using Freemind and coming with AI
Jinda is a tools for Ruby on Rails developer. (Required: basic Ruby on Rails )
Jinda use the following technologies:
- JQuery Mobile and Bootstrap as Javascript front-end development framework
- Rails Engine as Jinda core for router, helper
- Workflow using Freemind design as XML to control Rails flow.
- User authentication for login and role for each activity
- Support Social authentication: Facebook, Google
- Polymorphic Association in mongodb
- Dynamic role for user and group
- Rails concern & mixins for rails modules and class
- Sample app: Articles, API Note, Document
- Support themes: Jinda_adminlte, Jinda_adminBSB
- Support HTML, HAML, SCSS
- AI


Additional Extension themes also available at


Prerequisites
Jinda 0.8.0+ is compatible with Ruby 3.1+ and Rails 7.0+
These versions works for sure but others may do.
- Ruby 3.1.2
- Rails 7.0.0
- MongoDB 6
- Freemind 1.0.1
Note for Mac M1
- Once finish configure: Ruby and Rails version
- Need Pre-install Nokogiri as follow:
arch -x86_64 gem install nokogiri -v '1.10.10' --platform=ruby -- --use-system-libraries
Note for Rails 7
- depend on mongoid dependencies: activemodel need to satify with Rails 7
Convention
- database is MongoDB
- images stored in upload directory, unset IMAGE_LOCATION in
initializer/jinda.rbto use Cloudinary - mail use Gmail SMTP, config in
config/application.rb - authentication use omniauth-identity
Sample Application
Screen shot install Jinda
Watch install video on YouTube
Sample Jinda in Docker
Supposed we want to create ecommerce web site, first create a Rails app without ActiveRecord
$ rails _7.0.0_ new YOURAPP -BOTJ
Add jinda to your Gemfile:
gem 'jinda'
For Development (most updated)
gem 'jinda', github:'kul1/jinda'
depend on your operating system, you may need to uncomment
gem 'therubyracer', :platforms => :ruby
install gems
$ bundle install
generate jinda application
$ rails generate jinda:install
Then run bundle again to install additional gems added by jinda
$ bundle install
configure mongoid, omniauth
$ rails generate jinda:config
Please make sure mongod is running then create admin user
$ rails jinda:seed
# Option: to use jinda_adminlte theme require add Gemfile with:
gem 'jinda_adminlte'
Then
$ rails g jinda_adminlte:install
now the application is ready, start it as any Rails application Please include your .env for social login, here sample
GOOGLE_CLIENT_ID=

GOOGLE_CLIENT_SECRET=
$ rails server
go to http://localhost:3000, click Sign In on the left menu, and enter user name admin and password secret
Quick Test Run
For developers, this section provides a streamlined way to clone, install, and test a Jinda-powered Rails app. It validates the gem's functionality and auto-starts a sample application for immediate exploration.
Prerequisites
- Ensure MongoDB is running on the default port 27017. If not installed or running, use Docker for quick setup:
(Stop with
docker run -d -p 27017:27017 --name mongodb_test mongo:latestdocker stop mongodb_testwhen done.)
Steps
-
Clone the Repository: Download the Jinda gem source to your development directory (e.g.,
~/mygem):git clone https://github.com/kul1/jinda.git ~/mygem/jinda -
Navigate to the Directory:
cd ~/mygem/jinda -
Run the Test Script: Execute the automated installer and server starter:
bash test_run.sh- This creates a new Rails app (
jinda_test_app_XXXX), installs Jinda, seeds the database (admin/secret user), and auto-starts the server on the first available port (starting from 3000, e.g., http://localhost:3000). - Access the app in your browser, sign in with username
adminand passwordsecret, and explore the menu (e.g., Notes, Articles, Admin > Mindmap Editor). - Press Ctrl+C to stop the server and return to the original directory (app preserved for reuse).
- This creates a new Rails app (
For a cleanup-only run (tests without preserving the app): bash test_run.sh -C.
This quick test confirms Jinda's installation and generates a functional app based on the default mindmap. Proceed to the guide below for customization.
Jinda Gem - Quick Start Guide: Building a Notes, Articles, or Documents App
Jinda generates complete Rails applications from a Freemind mindmap file (app/jinda/index.mm). All generated code (models, controllers, views, etc.) originates from templates in the Jinda gem at $HOME/mygem/jinda/lib/generators/jinda/templates/app. During rails generate jinda:install and rake jinda:update, these templates are copied and populated based on your mindmap. Code between # jinda begin and # jinda end in generated files is overwritten on updates; add custom code outside these markers to preserve it.
This guide focuses on using the default mindmap to manage Notes, Articles, or Documents. The default index.mm (generated from the gem template) includes ready-to-use branches for these. Edit app/jinda/index.mm in Freemind, save, then run rake jinda:update to regenerate code.

The mindmap has three main branches:
- models: Defines MongoDB models (via Mongoid).
- services: Defines left-side menu modules (main menu) and services (sub-menu workflows).
- roles: Defines user roles (e.g., admin, member). Defaults suffice; leave intact unless customizing.
Models: Defining Your Data Structure
The default models branch includes samples like person, address, article, note, picture, and comment. For a Notes app, use/modify note; for Articles, use article; for Documents, adapt picture or add document.
Under a model (singular, Rails convention), sub-branches define fields:
- Plain text (e.g.,
title): Default String field. - With type (e.g.,
body: text): Mongoid type (string, integer, date, boolean, array, etc.). - Raw code (e.g.,
belongs_to :user): Right-click branch > Insert > Icon > pen (edit icon) to add Mongoid associations, validations, indexes, etc. - File uploads (e.g.,
file): Use String; Jinda handles storage (filesystem/Cloudinary) and URL generation.
Example: Default note model (for Notes app):
models
└── note
    ├── include Mongoid::Attributes::Dynamic (pen icon: enables dynamic fields)
    ├── title (String)
    ├── body (text)
    ├── belongs_to :user (pen icon: association)
    ├── before_validation :ensure_title_has_a_value (pen icon: callback)
    ├── validates :title, length: { maximum: 30 }, presence: true (pen icon: validation)
    └── private def ensure_title_has_a_value ... end (pen icon: method)

Save and run rake jinda:update. This updates app/models/note.rb (generated from gem template lib/generators/jinda/templates/app/models/note.rb):
# jinda begin
class Note
  include Mongoid::Document
  include Mongoid::Attributes::Dynamic
  field :title, type: String
  field :body, type: String
  belongs_to :user
  before_validation :ensure_title_has_a_value
  validates :title, presence: true, length: { maximum: 30 }
  # ... private method ...
  # jinda end
end
For Articles (article model): Fields like title, text, body, with belongs_to :user and has_many :comments.
For Documents: Modify picture (fields: picture, description, belongs_to :user) or add document with title, file: string, belongs_to :user.
Add custom code (e.g., scopes) outside markers.
Services: Building Menus and Workflows
Defaults include users, admins, devs (leave intact for auth/admin). Ready services: notes: Notes (for Notes), articles: Article (for Articles), docs: Document (for Documents).
Each module (first sub-branch, e.g., notes: Notes) creates:
- Controller (
app/controllers/notes_controller.rb, from template). - Main menu item ("Notes").
Sub-branches define access/steps:
-
role: m: Restricts to 'm' (member role). -
link:label:/path: Simple link (e.g.,link:My Notes:/notes/my→ submenu linking to user notes). - Service branches: Multi-step workflows.
- Screen icon (UI): View form (e.g.,
new_note: New→app/views/notes/new/new_note.html.erb, from template).- Sub-branch rules: e.g.,
role: morrule: login? && own_note?.
- Sub-branch rules: e.g.,
- Bookmark icon: Controller method (e.g.,
create→def create). - Forward icon: Redirect (e.g., to
/notes/my).
- Screen icon (UI): View form (e.g.,
Example: Default notes: Notes service (for creating/editing notes):
services
└── notes: Notes (module: menu "Notes")
    ├── link:My Notes:/notes/my (role: m)
    └── new: New Note (service)
        ├── new_note: New (screen icon, role: m)
        ├── create: Create (bookmark icon)
        └── /notes/my (forward icon: redirect)
    ├── edit: Edit (service)
        ├── select_note: Select (screen, role: m)
        ├── edit_note: Edit (screen, role: m)
        └── update: Update (bookmark)
    ├── delete: Delete (service, fork style)
        ├── select_note: Select (screen, role: m)
        └── delete: Delete (bookmark)
    └── ... (mail, xedit)

Example: Add an "articles" module (default articles: Article service, for creating/editing articles with comments):
services
└── articles: Article (module: menu "Articles")
    ├── link:All Articles:/articles
    ├── link:My article:/articles/my (role: m)
    └── new_article: New Article (service)
        ├── form_article: New Article (screen icon, role: m)
        ├── create: Create Article (bookmark icon)
        └── /articles/my (forward icon: redirect)
    ├── edit_article: Edit Article (service)
        ├── select_article: Select Article (screen, role: m)
        ├── edit_article: Edit Article (screen, role: m)
        └── j_update: Update Article (bookmark)
    ├── xedit_article: xEdit Article (hidden service)
        ├── edit_article: Edit Article (screen, role: m)
        └── j_update: Update Article (bookmark)
    └── comments: Comment (service, linked to articles)
        ├── new_comment: New Comment (role: m)
        │   └── create (bookmark)
        └── /articles/my (forward icon: redirect)

Save and run rake jinda:update. Generates/updates:
-
app/controllers/notes_controller.rb(skeleton from template; add custom logic outside markers). - Views like
app/views/notes/new/new_note.html.erb(basic form from template; uncomment/edit fields):
<!-- app/views/notes/new/new_note.html.erb -->
<h1>New Note</h1>

<%= f.text_field :title, placeholder: "Note Title" %>
<%= f.text_area :body, placeholder: "Note Body", rows: 10 %>

<!-- Jinda provides form_tag, submit -->
In controller, implement methods (e.g., create outside markers):
# app/controllers/notes_controller.rb

class NotesController < ApplicationController
  # jinda begin
  # ... generated skeleton ...
  # jinda end

  def create
    @note = Note.new(note_params)
    @note.user = current_user
    if @note.save
      redirect_to notes_my_path, notice: "Note created!"
    else
      render :new_note
    end
  end

  private

  def note_params
    params.require(:note).permit(:title, :body)
  end
end
Similar for articles: Article (create/edit with comments) and docs: Document (new/edit with file upload).
For full CRUD: Defaults include list (/notes/my), edit, delete. Add steps like show_note: Show (screen icon) for views.
Test: rails s, login (admin/secret), navigate to "Notes" > "new".
Roles: User Permissions
Defaults: m: member (basic), a: admin (full), d: developer. Reference in services (e.g., role: m). Add roles like editor: Editor if needed.
Next Steps
- Seed:
rails jinda:seed. - MongoDB:
docker run -d -p 27017:27017 mongo. - Customize: Edit mindmap (e.g., add fields to
note), runrake jinda:update. - Themes:
gem 'jinda_adminlte'; bundle install; rails g jinda_adminlte:install. - API: Defaults include
api/v1/notesfor RESTful endpoints. - Advanced: Multi-step rules, polymorphic comments (already in
commentmodel).
Iterate: Modify mindmap, update, test login/menu at localhost:3000. For new apps, extend defaults for your Notes/Articles/Documents workflow.
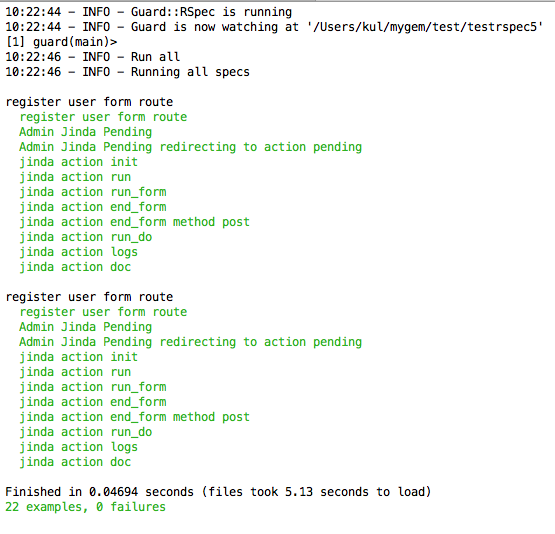
Testing
run following command:
rails generate jinda:rspec
guard init
guard
Contributing
- Fork it
- Create your feature branch (
git checkout -b my-new-feature) - Commit your changes (
git commit -am 'Add some feature') - Push to the branch (
git push origin my-new-feature) - Create new Pull Request