no style, please!
![]() A (nearly) no-CSS, fast, minimalist Jekyll theme.
Inspired by elly's site riggraz
A (nearly) no-CSS, fast, minimalist Jekyll theme.
Inspired by elly's site riggraz

Features
-
new
- tags support
- mathjax , inluce_code post_link support, include support, link to other post
- encrytion support. Only those who know the password can view the article
IMPORTANT NOTE ONLY textual contents of article will be encrypted ,the pictures will NOT be encrypted
Encrypt your post
Here are two options for encrypting your password: the first is a web-based method, and the second involves using a Ruby tool. We highly recommend choosing the web-based method.
✧ Using this web tool, it's very convenient to complete the following tasks
-
get your privateKey open the website 'https://vitock.github.io/jekyll-zeta/Proctect-your-password'

-
encrypt Your password

-
edit the
_config.yml


-
set your private Key to github ci


-
push the repo


using web tool
- generate keypair through this website
using ruby tool
1. generate your own public & private key to protect your password
ltectool g
you will get
publickey: AAA
privatekey: BBBBB
2. encrypt your password
 # ltectool e [your publickey] [your password]
 # like below
 ltectool e Arkuf0hG0sjifj+G57o4gwPgnXXD72kIhjhSGjyyGCdS 123

 # output
AQAQACAAIQCVKE9YHFT4pzyMa84kqGK+4Olo3EeDlymDa0oZcsQ48j8S4D4fMFb37gUT4LgrxZQDCFLa402i9VhhMIYWXZP+WSsv2Ia+uQpEH5vYKgDR5vL4xXC/76wXl3K7abU7u9du
you get your encrypted password ,
then put it in _config.yml
enc_tags:
    - tag: encrypt1
      password: "123"  # plain text ,NOT recommended

    - tag: encrypt2
      # 123
      password: AQAQACAAIQCVKE9YHFT4pzyMa84kqGK+4Olo3EeDlymDa0oZcsQ48j8S4D4fMFb37gUT4LgrxZQDCFLa402i9VhhMIYWXZP+WSsv2Ia+uQpEH5vYKgDR5vL4xXC/76wXl3K7abU7u9du
add JEKYLL_EC_PRIVATEKEY to ENV before you run jekyll build or set JEKYLL_EC_PRIVATEKEY to your CI environment
 #export set JEKYLL_EC_PRIVATEKEY=[Private key]
 export set JEKYLL_EC_PRIVATEKEY="NWWtiQbDnSDvTdogCzAjqNqHGTZrRXdmXQrEKiv3vNs="
for security, I recommend you to use different repos to store your source files and the _site files
-
origin:
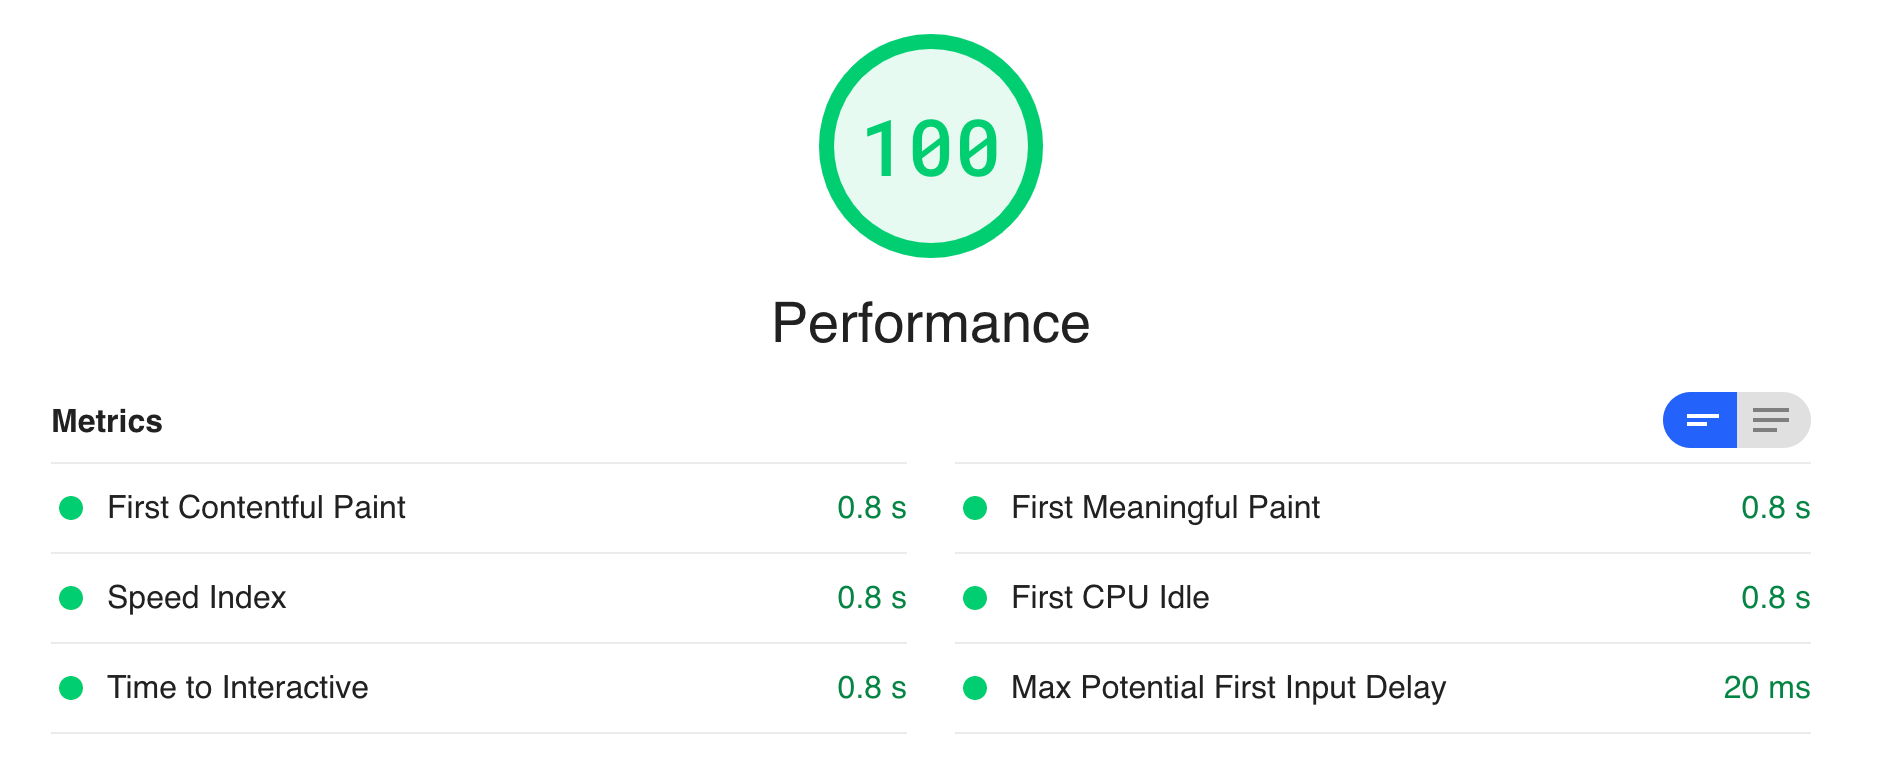
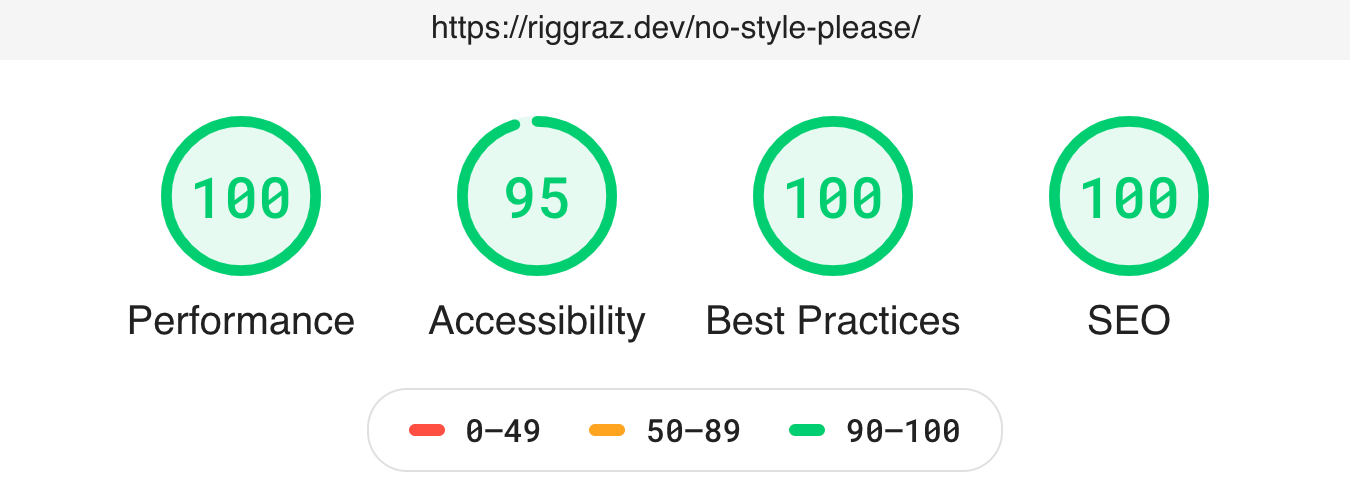
- Fast (1kb of CSS! For more information on performance and more, see Page Speed Insights report and Lighthouse report)
- Light, dark and auto modes
- Responsive
- Content first (typography optimized for maximum readability)
SEO optimized (uses Jekyll SEO Tag)RSS feed (uses Jekyll Feed)Fully compatible with GitHub Pages (see GitHub Pages installation)
you should build the _site by yourself , because githubpage do not support all plugins
Installation
If you haven't already created your blog using Jekyll, follow the instructions to do so from Jekyll's documentation.
NOTE: if you are using Jekyll with GitHub Pages, see the GitHub Pages installation section.
Then, to style your blog with this theme, add this line to your Jekyll site's Gemfile:
gem "no-style-please2"And add this line to your Jekyll site's _config.yml:
theme: no-style-please2And then execute:
$ bundle
Or install it yourself as:
$ gem install no-style-please2
Customize the menu
In order to add/edit/delete entries from the main menu, you have to edit the menu.yml file inside _data folder. Through that file you can define the structure of the menu. Take a look at the default configuration to get an idea of how it works and read on for a more comprehensive explanation.
The menu.yml file accepts the following fields:
-
entriesdefine a new unordered list that will contain menu entries - each entry is marked by a
-at the beginning of the line - each entry can have the following attributes:
-
title, which defines the text to render for this menu entry (NB: you can also specify HTML!) -
url, which can be used to specify an URL for this entry. If not specified,titlewill be rendered as-is; otherwisetitlewill be sorrounded by a link tag pointing to the specified URL. Note that the URL can either be relative or absolute. Also note that you can get the same result by placing an<a>tag in thetitlefield. -
post_list, which can be set either totrueor to an object. If it is true, the entry will have a list of all posts as subentries. This is used to render your post list. If you want to customize which posts to render (e.g. by category), you can add one or more of the following attributes underpost_list:-
category, which can be set to a string. It is used to render a list of posts of the specified category only. If you don't set it, then posts of all categories will be rendered. -
limit, which can be set to a number. It specifies the number of posts to show. If not set, all posts will be rendered. -
show_more, which can be true. If it is true and if the number of posts to show is greater than the specifiedlimit, render a link to another page. To specify the URL and the text of the link, you can setshow_more_urlandshow_more_textattributes, which are documented below. -
show_more_url, which can be a string. It specifies the URL for the show more link. Use only ifshow_moreis true. This will usually redirect to a page containing all posts, which you can easily create using an archive page (see create archive pages section) -
show_more_text, which can be a string. It specifies the text for the show more link. Use only ifshow_moreis true.
-
-
entries, yes, you can have entries inside entries. In this way you can create nested sublists!
-
Show all tags
create a tags.md with content below
---
title: TAGS
layout: tags
permalink: /tags/index.html
---
add a entry in the _data/menu.yml
- title: tags
  url: tags
Create archive pages
A so-called archive page is a page that shows a list of posts (see this for an example). You can create an archive page by creating a page and putting the following frontmatter:
---
layout: archive
title: The title of the page here
which_category: name-of-category
---
which_category is optional: if you don't put it, then all posts of the blog will be listed; on the other hand, if you specify a category, only posts of that category will be shown.
This feature is particularly useful if used together with the show_more attribute in the menu. For example, if you want to limit the number of posts shown in the home page to 5 but add a link to view them all, then you can create an archive page using the method showed above and link to it using the show_more_url attribute in menu.yml. See this example if you're in doubt.
Customize the index page
The index.md page should use layout home, which is the layout that displays the menu. If you want to have some content after the menu, you can just add that content in the index.md file, and it will automatically show under the menu.
Another thing you can do to customize the index page is show the description of your blog between the title and the menu. To do this, just edit _config.yml and change theme_config.show_description to true.
Pro tips
Dark mode for images
This theme provides dark mode by inverting all colors of light mode throught the CSS invert() function. This approach would also invert the color of all images, but, since this is not the behaviour one would expect, images are not inverted by default.
However, if you would like to force the color inversion on a specific image you can do so by applying class="ioda" to that image ("ioda" stands for "invert on dark appearance"). See the image in the overview post for an example of this approach. Note that color inversion will take place only when the theme has dark appearance!
For example, if you have a black and white image it could make sense to invert it in dark mode. On the other hand, a colorful image will probably look bad if inverted.
Contributing
Bug reports and pull requests are welcome on GitHub at https://github.com/riggraz/no-style-please. This project is intended to be a safe, welcoming space for collaboration, and contributors are expected to adhere to the Contributor Covenant code of conduct.
Development
To set up your environment to develop this theme, run bundle install.
Your theme is setup just like a normal Jekyll site! To test your theme, run bundle exec jekyll serve and open your browser at http://localhost:4000. This starts a Jekyll server using your theme. Add pages, documents, data, etc. like normal to test your theme's contents. As you make modifications to your theme and to your content, your site will regenerate and you should see the changes in the browser after a refresh, just like normal.
When your theme is released, only the files in _layouts, _includes, _sass and assets tracked with Git will be bundled.
To add a custom directory to your theme-gem, please edit the regexp in no-style-please.gemspec accordingly.
License
The theme is available as open source under the terms of the GPL License.